Showing posts with label sewing. Show all posts

Monday, January 17, 2011

Desks and Floor Cushions

My husband made these lap desks for the girls for Christmas. I painted them and sewed the floor cushions.
The lap desk plans came from Ana White and the floor cusions from Living with Punks. They are inspired by Land of Nod Floor Cushions.
I made a few changes to her plan. I used a white cotton sheet for the liner and stuffed the inside with beads instead of "fluff". I also added a zipper so I could remove the top cover. I love that the girls can move this stuff into any room they want to play in. Very easy projects. We started a few days before Christmas and got all of the projects done in time.

Thursday, January 6, 2011

Felt Toy Truck

This is the first time I have ever seen a project and then got up and had all the supplies on hand and then finished within a reasonable time frame. She gives the full instructions and I had enough felt to make 2 of these cute trucks.

I did make mine a little differently on the wheels. This was really easy and worth every effort.
And it is a BOY gift. On this blog, WHAT? I did go out and buy felt to make 2 pink trucks since my 2 girlies were wanting to play with these. Oooh...and I would love to do a firetruck version. Maybe if we have a boy bun in the oven.

Tuesday, November 16, 2010

Dollhouse Curtains


Stitch top closed


I sprayed these with hairspray. When you print onto fabric it is not permanent. I haven't tested to see if the hairspray helps, but it made me feel more secure. Up next the Kate's Kitchen dollhouse kitchen.


Sunday, November 14, 2010

Tummy Symbol Care Bears Style

Trace 4 circles and cut out.


Now there were 2 fabric transfer techniques I used for this project. The one I show you here is where you cut out the layers for an image and put together. I then used my copy machine and put the transfer paper in just like you would a regular sheet of paper. The image comes out and you do need to cut it out as close to the image as possible. The technique I used for the other side is just to put the transfer paper in the imagine and any image with letters needs to be flipped.

Here I outlined it in a blue marker BECAUSE I wasn't thinking ahead and my sheet is white and I made my clouds white. If I had thought ahead I would have made the clouds blue and not outlined, but by this point I am all in and not looking back. So I had a make it work moment with the blue marker.
This is the point where I used my iron to transfer the images. You want to use a hot iron with no steam. Turn off your steam setting and empty out any water. Preheat your iron. I put an old pillowcase on my cutting board. You want to apply heavy pressure for 20 to 30 seconds on each area really focusing on the edges. These images were transfered using the light transfers from Hobby Lobby.
Sandwiching the imaged circles facing with the empty circles on the outside, place the elastic inside pinning on the edges. I made my elastic long enough to wrap around my daughters belly it approxiamately 18 inches.

This is what it looks like with a closed sandwich. This is where you stitch around the edge of the circle leaving an opening to turn out.
Turned out and stuffed.
I stitched the whole way around for extra strength.


I wish I had a picture of my daughter wearing this because she is always talking about her tummy symbol. However, in a series of unfortunate events (me putting my energy into making it) she won't put it on. Don't you love three year olds. I just pictured a cute birthday party where everyone has their own tummy symbol to suite their personality. I hope this inspires.


Friday, November 12, 2010

Wreath Turned on its Side

I did this step by step so you all could see how easy this is to do. Especially with the Imagine, right girls? I had 2 of the wreaths and didn't know how to use them in a different way. When I was in my favorite small town coffee shop with the most incredible mochas I came up with this idea.


Recipe
Grapevine wreath
Kitchen String
White Paper
Paper Lunch Sacks
Imagine More Cart
Winter Wonderland
Fall Flowers


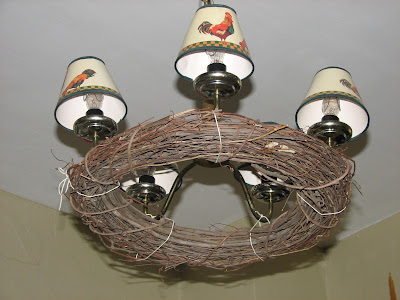
Hang on your favorite not so attractive looking chandelear from your previous resident spinster who locked herself in the house with multiple dead bolts on every door even interior ones.
Select your favorite birds. I also did varying sizes for each one. The printed birds are from Imagine More and the other bird is from Winter Wonderland filled with prints from Imagine More.


Use enough paper sacks to cut 2 silhouettes for each bird. I think I used 3.

Glue the birds to the paper sack then loosely cut through 2 layers.

I placed the string in between and then stitched around the edges switching my stitches between zigzag and straight stitch. Also varying the length of the zigzag.

Here they are up close.

I added a little sparkle to the Imagine More birds.

I then hung them using the string and some of them I tucked in the grapevine wreath.
I then added some really pretty fall flowers. I got the bouquet from Wal-Mart it was called fall bush. It was $5 and made it look so pretty and full.
Enjoy the prettiness. I loved the idea of using the birds from Imagine More and the bee image. Then you would have the birds and the bees, but it seemed more springtime than fall. I always save my projects in a plastic tote so I can pull them out later. So after I decorate this for Christmas the birds might get pulled back out for that reason.


Tuesday, November 9, 2010

Monday, November 8, 2010

Cricut Bow?


This bow really is too cute for words. I got the idea when I saw how cute it was on the paper doll I made. I thought, if it is cute on a paper doll it has to be cute on my girls. I might have to make a few more of these. Tell me what you think. It was a very quick process maybe 15 minutes with my 2 crazy girls running around and figuring out the best way to make it.


Friday, November 5, 2010

Another tiny pillow

I used the same iron on trasfer method as here. For the sewing: I used the same method as the keychains from Wednesday. I just stuffed with filling after turned out.

Wednesday, November 3, 2010

Gifts-Keychain

With right sides facing. Place 2 fabric scraps together.
Stitch around 3 sides leaving and opening to turn right side out.
Turn right side out.
This is what it looks like fully turned. You can press here.
Pin closed.
Stitch around all sides as close to the edge as possible.
Fold over ring and stitch back and forth a couple times.
CUTE!
I made 4 in no time. These would be a great gift to go with the coffee cozy.